Congratulations! You’ve made the move to Pardot or, as it’s now called, Marketing Cloud Account Engagement! For this post, we’ll refer to it as Pardot. The next step is to set up the fields you’d like to sync with Salesforce, your CRM. Pardot does some of the grunt work for you and comes out of the box with standard forms already set up and synced to Salesforce. Standard fields, or default fields, are the fields you’d see across most email and marketing systems, such as first and last name, city, state, country, website and email opt out. When a prospect comes into Pardot, any information you collect on them will sync with Salesforce and be available for your sales team to access. If you set up Pardot to create a new prospect each time a new lead or contact is created in Salesforce, then the same holds true for Salesforce. Any data entered into Salesforce will appear in Pardot.
What are custom fields?
Custom fields are fields above and beyond the default contact and lead fields. For example, non-US companies may need to add additional address fields, such as province, canton, region, etc. to reflect their country’s postal system more accurately. Nonprofits often add fields related to donation amount, size, frequency and even best gift amount. Because Pardot sits on the Salesforce database, you can create a custom prospect field for any contact or lead field that exists in Salesforce.
How to create a custom field in Pardot Lightning
Custom fields are located in the Pardot settings area. To create a custom field go to Pardot settings>Object and Field Configuration>Prospect Fields.
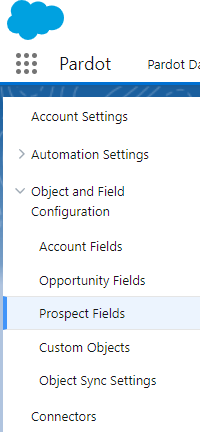
Custom fields come above default fields on this page. If you scroll down the page, you can see all of the default fields that have already been created for you. But, for the purposes of this blog post, let’s scroll back up to the top of the page to where it says ‘Custom fields’. Click on the button to add your first custom field.
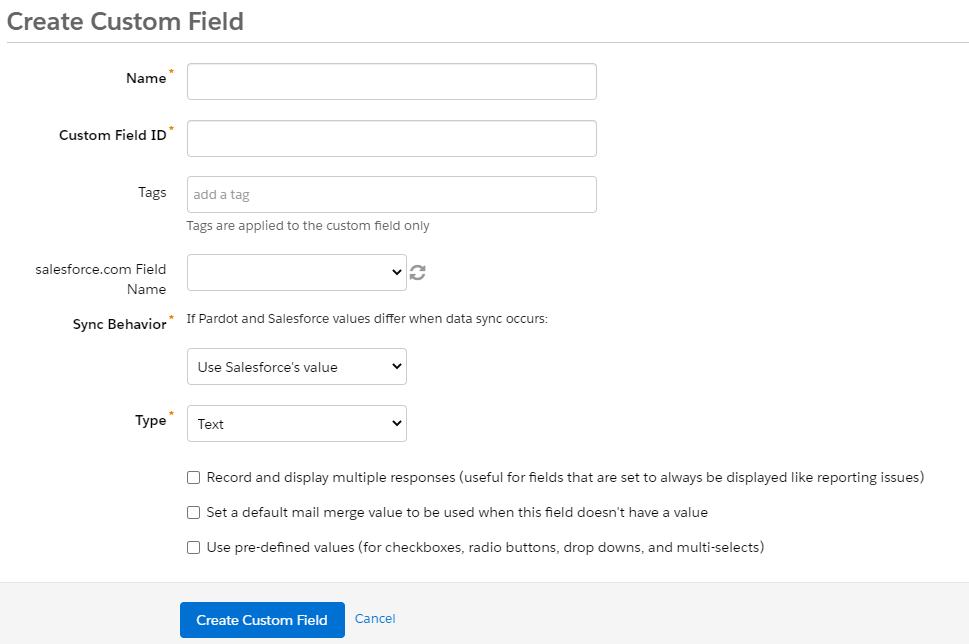
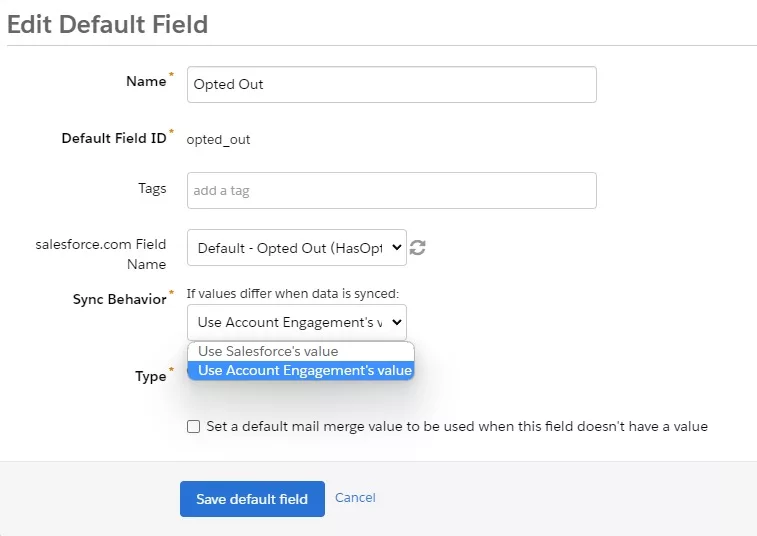
For most custom fields you’ll want to sync the field to Salesforce. The dropdown menu allows you to see all fields that are available for mapping. Once you’ve mapped your Pardot field to your Salesforce field, you need to decide which system takes precedence should values differ. There are three options from which to choose: Use Salesforce’s value, use Pardot’s or use the most recently updated value.

I normally leave Salesforce as the master record value, but there are times when I use the other two options, particularly for things like Pardot forms and custom redirects.
Tips for creating custom fields
Syncing fields that have multiple values (dropdown, radio, check boxes)
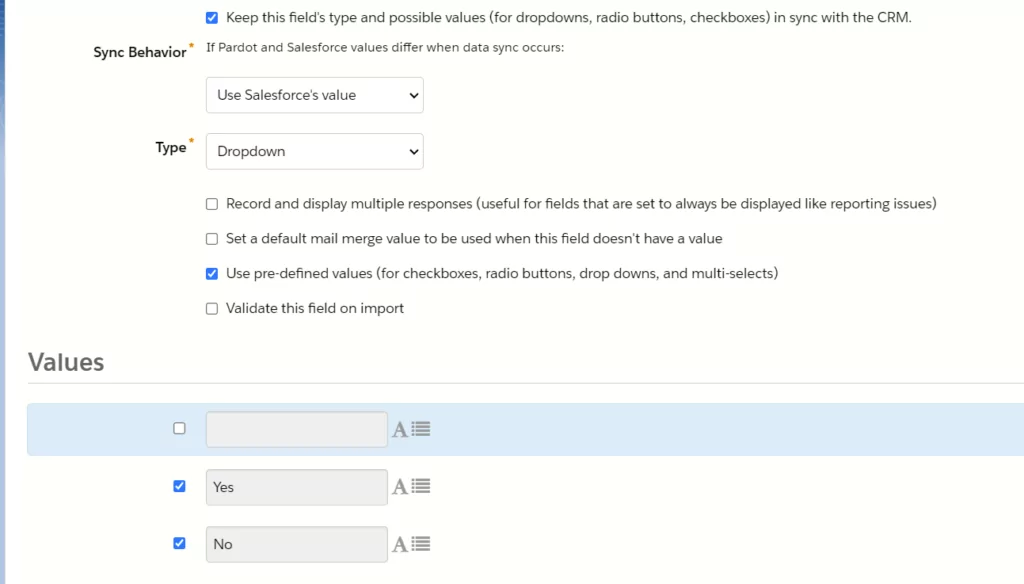
When syncing fields that have multiple values, such as a dropdown or pick list, ticking the box above Sync Behavior pulls the values in Salesforce. This ensures that your Pardot data matches perfectly. Note in the screenshot below that the values are grayed out and cannot be edited. If ‘Keep this field’s type and possible values’ box is unchecked, the field values can be manually altered.
Use custom fields for communication opt-ins
It’s good practice to have an opt-in check box on newsletter/email sign up forms. The box should, by default, be unchecked, so that the prospect has to manually opt-in and give their affirmative consent to receive communications. Prospects who manually opt-in for communications are also less likely to unsubscribe. Custom fields work well for email communication opt-ins.
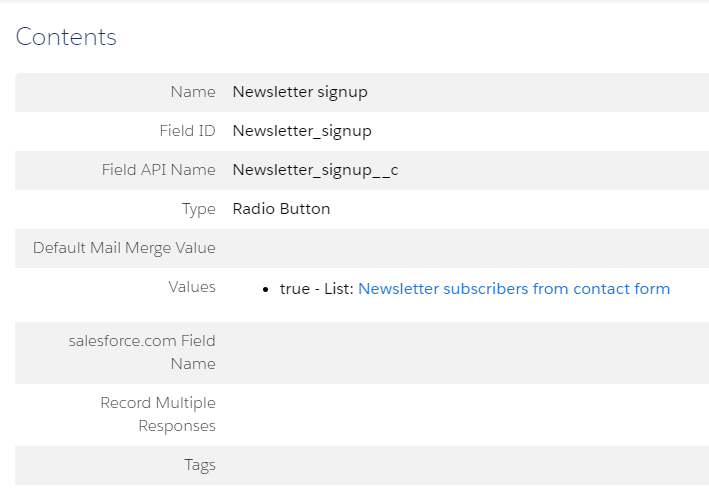
When creating the field I like to be as specific as possible on the name, especially if there are multiple newsletters or communications. Since this field is Pardot-specific, it does not sync with Salesforce or have a Salesforce field name. When this value is true, the prospect is also added to a list. To go a step further, you can fire off an email as a form completion action which requires the prospect to confirm their subscription. This is known as double opt-in or, with Pardot, confirmed opt-in.
Use custom fields for prospect segmentation
Custom fields can also be used to help qualify and/or segment your prospects. Let’s say you have a ‘contact us’ form. You could include the ‘comments’ default field and go through the text of every submission to determine the best fit for each person. This is time intensive and assumes the prospect gives you enough information to work with. Custom fields would be a perfect choice for this situation. Create a custom field with various answers to why the prospect may be reaching out, such as ‘I’d like more info on your product’ or ‘I’m interested in working for your company’. You can then use dynamic lists to automatically segment prospects into the appropriate list based on their selection and use automation rules to assign them to the appropriate person at your company.
Summary
Custom fields allow you to capture more information on your prospects. You can add custom fields from those that exist in Salesforce or you can create fields for data that you only need to reside in Pardot. Custom fields are an excellent way to create more targeted messaging and are easy to set up. If you have questions on how to set up or use custom fields, feel free to reach out. We’d be happy to give you a hand.
References
https://help.salesforce.com/s/articleView?id=sf.pardot_fields_create_custom_field.htm&type=5
About the Pardot rename
In April 2022, Salesforce announced the rebrand of Pardot to Marketing Cloud Account Engagement. While the rebrand unfolds and the world adapts to the new nomenclature, we'll typically keep the Pardot name in our blog posts.
There are several permutations of the new name being thrown about, so you may see us use any one of them as things evolve:
- Pardot
- Marketing Cloud Account Engagement
- Marketing Cloud Account Engagement (Pardot)
- MCAE
- MC Account Engagement
- Account Engagement by Pardot






0 Comments